How Can We Help?
Creating Transcripts
You can begin Creating your Transcript as your child enters High School or wait until their Senior Year and do it all at once. Providing maximum flexibility, Homeschool Planet will automatically enter all courses in your homeschool planner, as well as allow you to add courses not in your Homeschool Planet planner. Get started cataloging your student’s achievements, with the directions below!

Creating a Transcript
- Select Transcript from the Reports menu at the top of the planner.
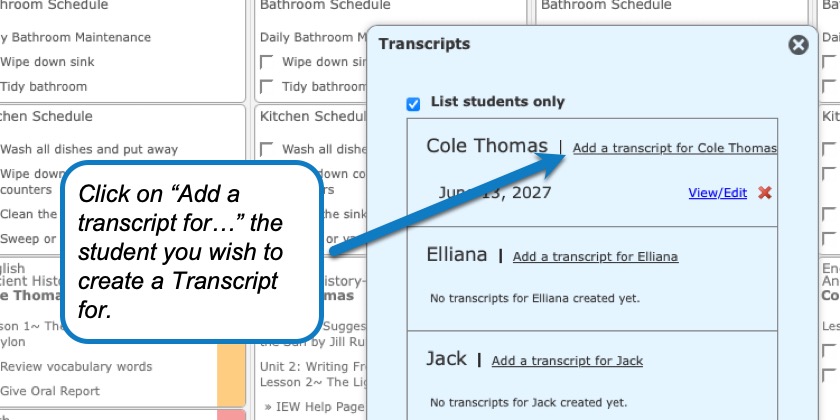
- Find the student’s name for which you wish to create a Transcript and click on the link “Add a transcript for [student’s name].”
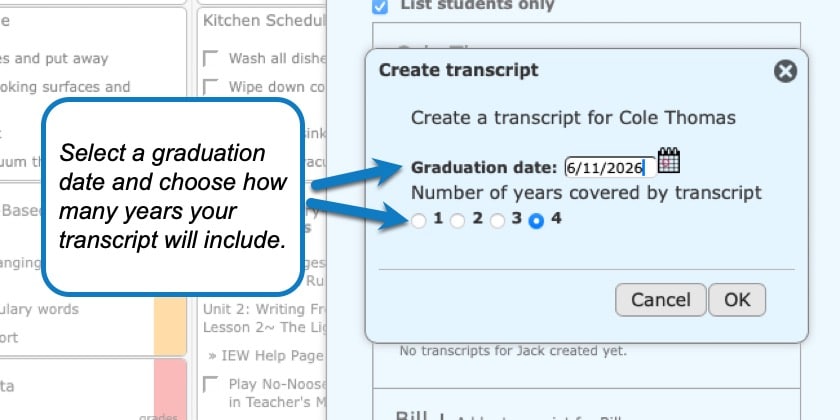
- Enter the graduation date for the student, even if it is a future graduation date, and select the number of years the Transcript will cover, then select “OK”.
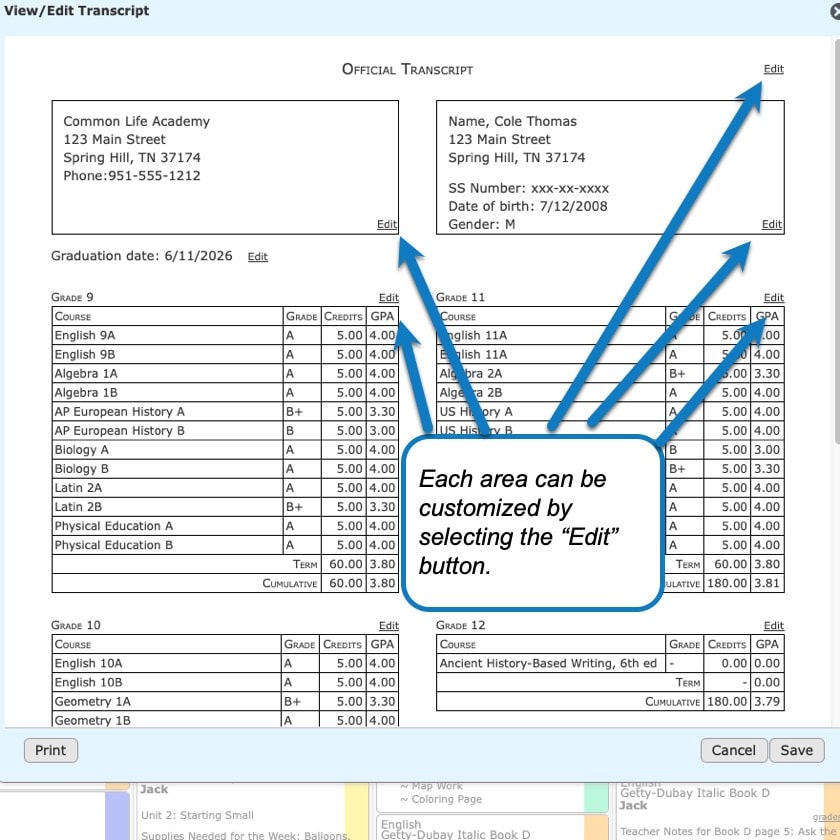
- Once the “View/Edit Transcript” pop-up window is displayed, you can click on the “Edit” link in each section to edit each box to fit your needs; entering your school name, entering further information for the student, adding courses to each year, etc. Virtually every area of this document is customizable.
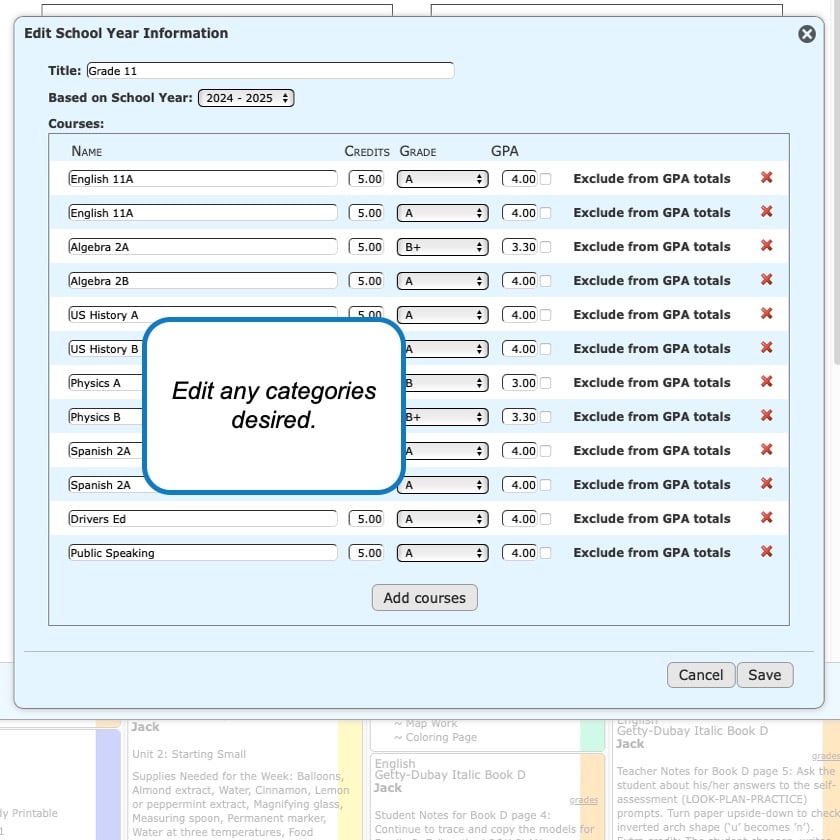
* When clicking the Edit link for a specific grade, a pop up window will open to select the applicable school year for that grade.
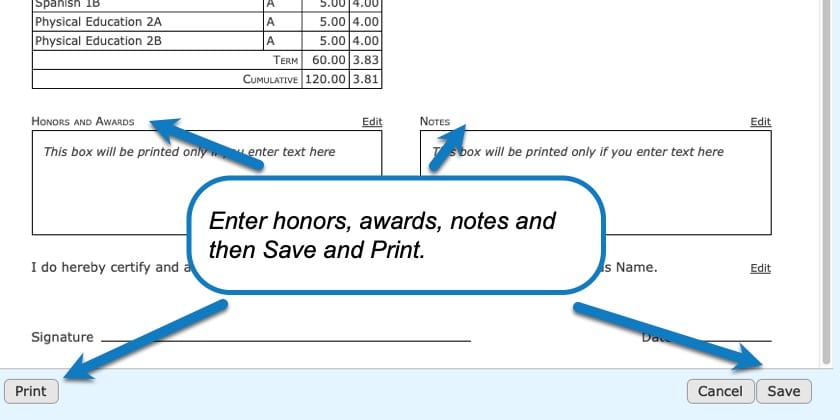
* When the “Add Courses” button is selected the Custom Courses window will appear. Custom courses allows you to add any course that may not be in your Homeschool Planner, or which was in your planner but without grading set up. This section will also allow those who do not have any past school years set up to add courses. When you have finished adding Custom Classes hit Save to return to the previous pop-up window. - If you don’t enter text in the boxes marked “Honors and Awards” and “Notes” the boxes will not print so that they don’t look empty!
- When you have completed your transcript, click the “Save” button (bottom right of pop-up window). There is a “Print” button available to print your Transcript (bottom left of pop-up window). There are further instructions for printing your Transcript here.
Screenshot Images

A few things to consider~
- You can also update a previously created Transcript by following steps 1 and 2 above, then selecting the View/Edit link next to the graduation date of the Transcript.
- Credits~ different states have different standards for credits allowed per course, or per number of hours, for awarded credit. Be sure to check what the standards are for the state you reside in.
- GPA~ You may wish to indicate whether your student’s GPA is weighted or unweighted in the Notes box. You may also want to create TWO Transcripts, one with a weighted grade and another with an unweighted GPA as different learning institutions have different requirements.
- You can leave a grade blank and have it say “In Progress” if the class is not finished or you don’t have a grade yet. It will not calculate the GPA to include this class but you can always go back in and change it once you do have the grade and the GPA will calculate accordingly.
- Consider purchasing Transcript Paper for this important document. A quick Google search will bring up several establishments where this can be purchased.
- We recommend you save a copy of your Transcript in PDF format on your computer’s hard drive so it is always available. If you need directions to this we have provided them here.
Transcript Video Tutorial
As always, feel free to reach out to us with any questions at support@homeschoolplanet.com. We are here to help you!
Not a subscriber yet? Check out Homeschool Planet for yourself with a 30-day FREE trial. No credit card information is necessary to give it a try!

With Homeschool Planet lesson plans, homeschooling has never been easier!


