How Can We Help?
Shared In Calendars
“Share in” allows you to display a calendar from another internet calendar application such as Google Calendar or Apple iCal on your Homeschool Planet calendar. Learn how below~

Share in an internet calendar application such as Google Calendar or Apple iCal
You can add many such calendars and for each you can choose which students will see that calendar when the student logs in. Before you begin this process you will need to find the internet address for the calendar you wish to add to Homeschool Planet.
To find the Share in Address for a Google Calendar:
- Go to your Google calendar page.
- Find the Google calendar you would like to share in the left column, under the “My calendars” heading.
- Click on the menu icon, three dots that will appear on the right when you hover over the calendar you want to share.
- From menu, choose Settings and Sharing.
- Scroll to the section titled, Integrate calendar
- Make the address from the section that reads, “Secret address in iCal format” visible by clicking the eyeball
- Copy the address and store it in your clipboard.
- Return to Homeschool Planet, and continue with the “Share In” instructions.
To find the Share in address for Apple iCal:
- Open the iCal application.
- Click on whichever calendar you wish to share and then choose the icon on the right.
- Select the box that reads Public Calendar and then choose done.
- Select the icon again and this time copy the URL to your clipboard.
- Return to Homeschool Planet, and continue with the “Share In” instructions.
To display events from another calendar inside Homeschool Planet follow these steps-
- Under the Settings menu choose Share.
- Select Share In tab if it is not already selected.
- Enter a name for the calendar in the name for this internet calendar field. You can choose anything you want. Homeschool Planet will display this name to you when referring to this calendar. Note: Click on, “Display scheduled events from another calendar in Homeschool Planet” if you are adding an additional calendar.
- Enter the URL address you copied in the step above.
- Choose a color for this calendar. All events from this internet calendar will be displayed in that color with no highlighting and with square corners to make them easy to identify.
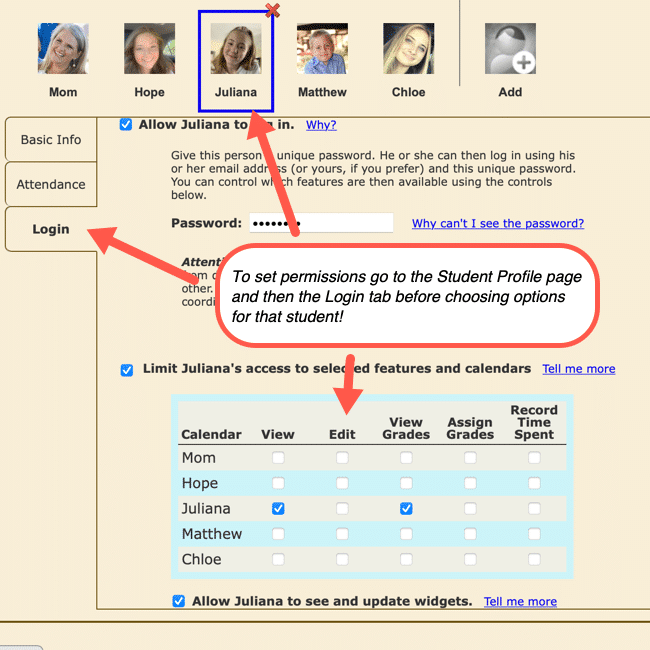
- Choose which students will be allowed to see this calendar when they log in. Only the students for whom you have enabled log-in in their student profile will be shown on this list.
- Choose Save from the lower right hand corner.
The events from this internet calendar will be displayed on your Homeschool Planet calendar. The information is updated periodically throughout the day and each time you log in to Homeschool Planet. an Apple iCal calendar will load quickly but it may take several minutes for a Google calendar to appear as Google updates when it decides to update! Please give the calendar the time to load.
Permissions Screenshot

Video Tutorial
As always, feel free to reach out to us with any questions at support@homeschoolplanet.com. We are here to help you!
Not a Subscriber yet? Check out Homeschool Planet for yourself with a 30-day FREE trial. No credit card information is necessary to give it a try!

With Homeschool Planet lesson plans, homeschooling has never been easier!


