How Can We Help?
Adding a Custom Photo to Your Theme
Homeschool Planet users can select from any of our pre-selected themes or upload their own favorite photo as a background image! To learn how to create a background with your own image follow the directions below.

Upload a Custom Photo for Your Planner
If you change your theme often, you might want to consider dragging your favorite images to your desktop or creating a folder to store them for easy access.
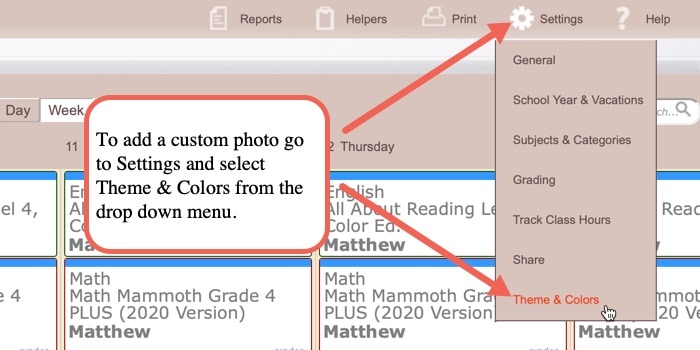
- Select Theme & Colors from the Settings drop-down menu, located at the top right of the Homeschool Planet page.
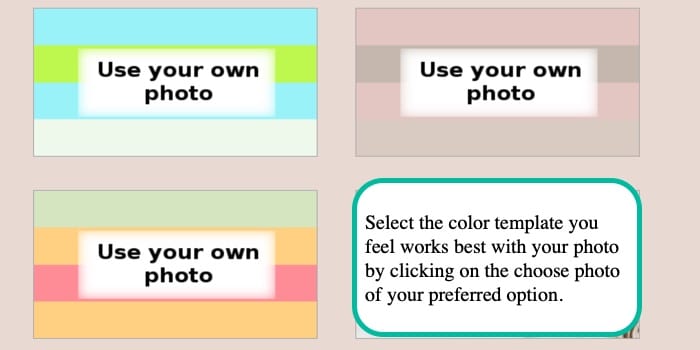
- There are seven color template options (used for frames, text, striping, and pop-ups). Simply click on the selection of the background you prefer.
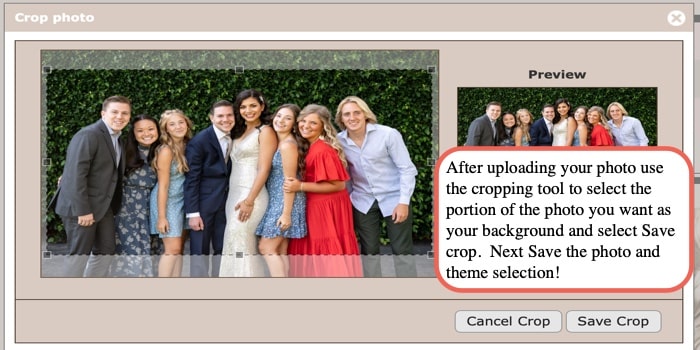
- Select the desired photo from your computer menu and crop as needed.
- Select Save crop followed by Save. You can adjust and change photos as often as you like by following the steps above.
- Other family members who have been given their own login can customize their themes by following the same steps.
Adding a Custom Photo Screenshots


Custom Photo Video Tutorial
As always, feel free to reach out to us with any questions at support@homeschoolplanet.com. We are here to help you!
For help with other questions you may have relating to your Account, see the following entries:
- Accessing Account Info
- Changing an Email Address
- Changing a Password
- Changing Payment Info
- Changing from Monthly to an Annual Subscription
- Daily & Weekly Digests
- How Many Students Can I Have?
- Subscribing after a Free Trial
- How to Cancel your Subscription
Not a Subscriber yet? Check out Homeschool Planet for yourself with a 30-day FREE trial. No credit card information is necessary to give it a try!

With Homeschool Planet lesson plans, homeschooling has never been easier!


